Even if mastering sushi can take a lifetime, Iron Chef star Masaharu Morimoto says anyone can make a well-balanced maki (roll) at home. Here, he demonstrates how in just a few simple steps.
Step 1: Make the Sushi Rice
A critical step is making great sushi rice: seasoning it as Morimoto does, with a mixture of rice vinegars, sugar, and salt, then carefully separating and fluffing the grains with a slicing motion. “Use your fingertips to delicately spread the rice,” says Morimoto. “You want a little space between the rice grains so that they remain fluffy.”
Step 2: Handling Sushi-Grade Fish
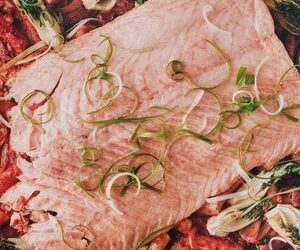
To be eaten safely, sushi-grade fish must be handled correctly: It should be frozen for at least one day to kill any parasites. For the best flavor and texture in oily, strong-smelling fresh fish, such as salmon and mackerel, rub the fillets with fine sea salt and let stand for 30 minutes; rinse the fish well, pat dry, and sprinkle all over with rice vinegar.
Prepare the Fillings: Crab and Tuna
Crab: Meat from Dungeness, blue, or king crabs is best. Pick over the meat for bits of shell.
Tuna: If a piece of tuna is sinewy, simply scrape the meat off the sinews with a sharp knife.
Prepare the Fillings: Salmon and Cucumber
Salmon: Slice salmon across the grain into strips about 4 inches long and 1/4-inch thick.
Cucumber: Seed a cucumber, then slice it — including some of the skin — into a thin julienne.
Prepare the Fillings: Avocado
Cut a ripe Hass avocado in half. Carefully strike the pit with the blade of a heavy chef’s knife, then twist the knife to remove the pit. Peel the halves, then cut them into 1/4-inch-thick slices.
Step 3: Form the Maki
Carefully wave a 4-by-7 1/2-inch sheet of nori over an open flame until crisp and fragrant, then transfer to a bamboo mat. Wet your hands in water that’s seasoned with rice vinegar, then scoop up 1/2 cup of sushi rice. Gently form the rice into a loosely packed, palm-width log. Place the log at one edge of the nori and begin spreading it across to the other side.
Form the Maki: Add the Wasabi and Filling
Continue to spread the rice all over the nori, rewetting your hands as necessary, until an even layer covers all but a 1/4-inch border at the top edge. Spread about 1/4 teaspoon of wasabi lengthwise along the middle of the rice. Lay about 2 ounces of the filling (either a single ingredient or a combination) along the center of the rice.
Wasabi Tip: “Rice, wasabi and fish should be in harmony,” says Masaharu Morimoto. “We use more wasabi with fatty fish, less with lean fish.”
Step 4: Roll the Maki
Roll the bamboo mat up and away from you, curling the nori and rice around the filling; use your fingers to hold the filling in place as you roll. Secure the roll with the 1/4-inch flap of nori. Once the roll is sealed, gently squeeze, pressing gently on the top and sides, to compress the roll slightly and form a rough square shape. Press on each end of the roll to make a neat surface.
Step 5: Cut the Maki
Lift the roll off the bamboo mat and transfer it to a work surface. Dip the tip of a long, sharp knife into vinegar water; let the water run down the length of the blade. Using a long slicing motion, cut the maki in half, then cut each half into thirds to form six even pieces, rewetting the blade as needed. Serve.