People, I am so excited about this recipe, it’s pretty much all I can talk about this week. I mentioned it to a broker who showed us another dud of an apartment (more about that if/when we make it out alive). I mentioned it to a friend who doesn’t eat sweets (and we’re still friends! Really, it’s more for everyone else.). And I tried to explain it to another friend who has probably never baked in her life, who politely nodded, smiled and scooted out of the room. As you can see, I can be incredibly boring when I get excited about cooking. That’s what you’re here for.

I have been wanting to come up with a completely home-baked, from scratch and all-natural chocolate wafers for years. It has been an outright obsession of mine, since Alex introduced me to the fabulousless that is Icebox Cake and I was disappointed to learn that the only way to make it was to buy some often-hard-to-find Nabisco chocolate wafers with their own set of disconcerting ingredients. I knew a homemade recipe was out there — for crazy people like me, it’s not like if you’re looking for a shortcut, the store bought ones still won’t do — but I had a hard time finding it.

Icebox cake wafers are not any old wafers, they need to have the ability to absorb what is around them and become cake-like — in the end, the cake slices like one, not like a stack of cookies slathered with lightly sweetened whipped cream, taking on the resemblance of a decoratively assembled plate of Oreos and eee, am I the only one drooling right now?


So you can imagine my ecstatic excitement discovering that I had a chocolate wafer recipe in front of me the whole time. In a cookbook I have owned for years. From a person who seems as obsessed with getting the chocolate wafer right for icebox cakes as I am. Oh, and if you need another bonus beyond that? They’re insanely easy to make, whizzed in a food processor and then sliced from a refrigerated log. It’s like Alice Medrich knows you just want to get onto the cake-making already!

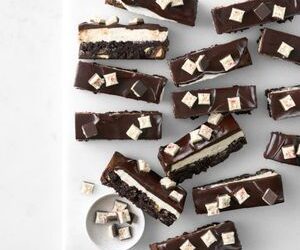
That isn’t to say that a chocolate wafer is only good for icebox cakes — perish the thought! These cookies are amazing on their own, whether you have one with coffee, dunked in glass of milk or a bowl of ice cream, or heck, even make wee ice cream sandwiches with them. (Keeping them in the freezer overnight will cause the cookies to soften a bit, much like the ice cream sandwiches I grew up with!) I could imagine adding a dash of peppermint extract, enrobing them in chocolate and making home Girl Scouts-style Thin Mints with them. The possibilities are endless and I would like to taste one of each. I’m ambitious like that.

One year ago: Chicken with Almonds and Green Olives
Two years ago: Risotto al Barolo + Green Crostini
Chocolate Wafers
Adapted from Alice Medrich’s Pure Dessert
I don’t usually make a big fuss about buying this brand or that of a product. I don’t believe you need zillion dollar, hard-to-find ingredients to cook well. But there are some recipes, recipes that get their primary flavor from a single ingredient where that quality of that ingredient largely informs the quality of the end product. (I’m thinking of the butter in shortbread, the stock in risotto or soup, etc.) In this case, that cocoa you splurged on that one time for a special occasion might just be ready for its closeup. I went for what I consider “la creme”, Valrhona — I’m throwing this out there not to pressure you to buy something you might feel is out of your budget, but so so you know why my cookies are so dark; Valrhona is a very intense cocoa — but if you have another decadent favorite on hand, go for it.
These cookies are crisp and not overly sweet. They’d be good with anything from coffee to ice cream to fancier things, like ice cream sandwiches, crumb crusts and icebox cakes (scroll down for an Icebox Cupcake recipe).
Last note: As an icebox cookie, these will take longer to soften than the store-bought wafers, so set aside more time than you normally would. I think 24 hours in the fridge would be ideal.
Makes 50 to 60 1 3/4-inch wafers. However, I cut my thinner than suggested and yielded more.
1 1/2 cups (6.75 ounces) all-purpose flour
3/4 cup (2.4 ounces) unsweetened cocoa powder (see Note)
1 cup plus 2 tablespoons sugar
1/4 teaspoon salt
1/4 teaspoon baking soda
14 tablespoons (1 3/4 sticks) unsalted butter, slightly softened
3 tablespoons whole milk
1 teaspoon pure vanilla extract
Combine the flour, cocoa, sugar, salt, and baking soda in the bowl of food processor and pulse several times to mix thoroughly. Cut the butter into about 12 chunks and add them to the bowl. Pulse several times. Combine the milk and vanilla in a small cup. With the processor running, add the milk mixture and continue to process until the mixture clumps around the blade or the sides of the bowl. Transfer the dough to a large bowl or a cutting board and knead a few times to make sure it is evenly blended.
Form the dough into a log about 14 inches long and 1 3/4 inches in diameter. Wrap the log in wax paper or foil and refrigerate until firm, at least one hour, or until needed.
Position the racks in the upper and lower thirds of the oven and preheat the oven to 350°F. Line the baking sheets with parchment paper. Cut the log of dough into slices a scant 1/4-inch thick (I went thinner, closer to 1/8 of inch. If you’re trying to emulate the store-bought wafers, slice as thin as you can, and watch the baking time carefully, as it might be less.) and place them one inch apart on the lined sheets (cookies will spread). Bake, rotating the baking sheet from top to bottom and back to front about halfway through baking, for a total of 12 to 15 minutes. The cookies will puff up and deflate; they are done about 1 1/2 minutes after they deflate.
Cool the cookies on the baking sheets on racks, or slide the parchment onto racks to cool completely. These cookies may be stored in an airtight container for up to two weeks or be frozen for up to two months.
Note: These cookies should crisp as they cool. If they don’t, you’re not baking them long enough, says Medrich — in which case, return them to the oven to reheat and bake a little longer, then cool again.
Icebox Cupcakes
I came up with these a while ago as a way to make the icebox cake a little more single serving size. How many you’ll get depends on how many you want to stack — I use five, but the height comes up a tad short of your standard frosting-dolloped bakery cupcake. They’re decadent enough, in my opinion. Keep in mind that your cupcake will be too big for a standard sized paper liner, I just pressed the sides down a bit to make mine work. But if I knew I was making an entire batch of these, I’d make the cookie log smaller, more like 1 1/4 to 1 1/2 inches in diameter.
Makes about a dozen cupcakes, but this will vary depending on the size and thickness of your cookies, and the height of your stacks. I use five apiece.
1 batch of Chocolate Wafers (recipe above)
1 cup whipping cream
1 to 2 spoons of powdered sugar (adjusted to your preferred sweetness; I like my whipped cream barely sweetened)
A dash of your favorite flavoring or extract (I use about 1/2 teaspoon vanilla)
Whip cream with a spoonful or two of powdered sugar and a dash of a flavoring of your choice, until the whipped cream holds firm peaks. Spread about two teaspoons whipped cream between each cookie, to the edges, and stack them until you reach the height you’d like. If you spread whipped cream on top of the final cookie, you will end up with a softer lid — a good thing — but I prefer the look of the brown cookie top.
Set them in the fridge at least overnight or up to a day. The cookies will soften as they set, and become cake-like.

